

Sopes Recipe
 by Sommer Collier — last updated on Sep 3, 2026
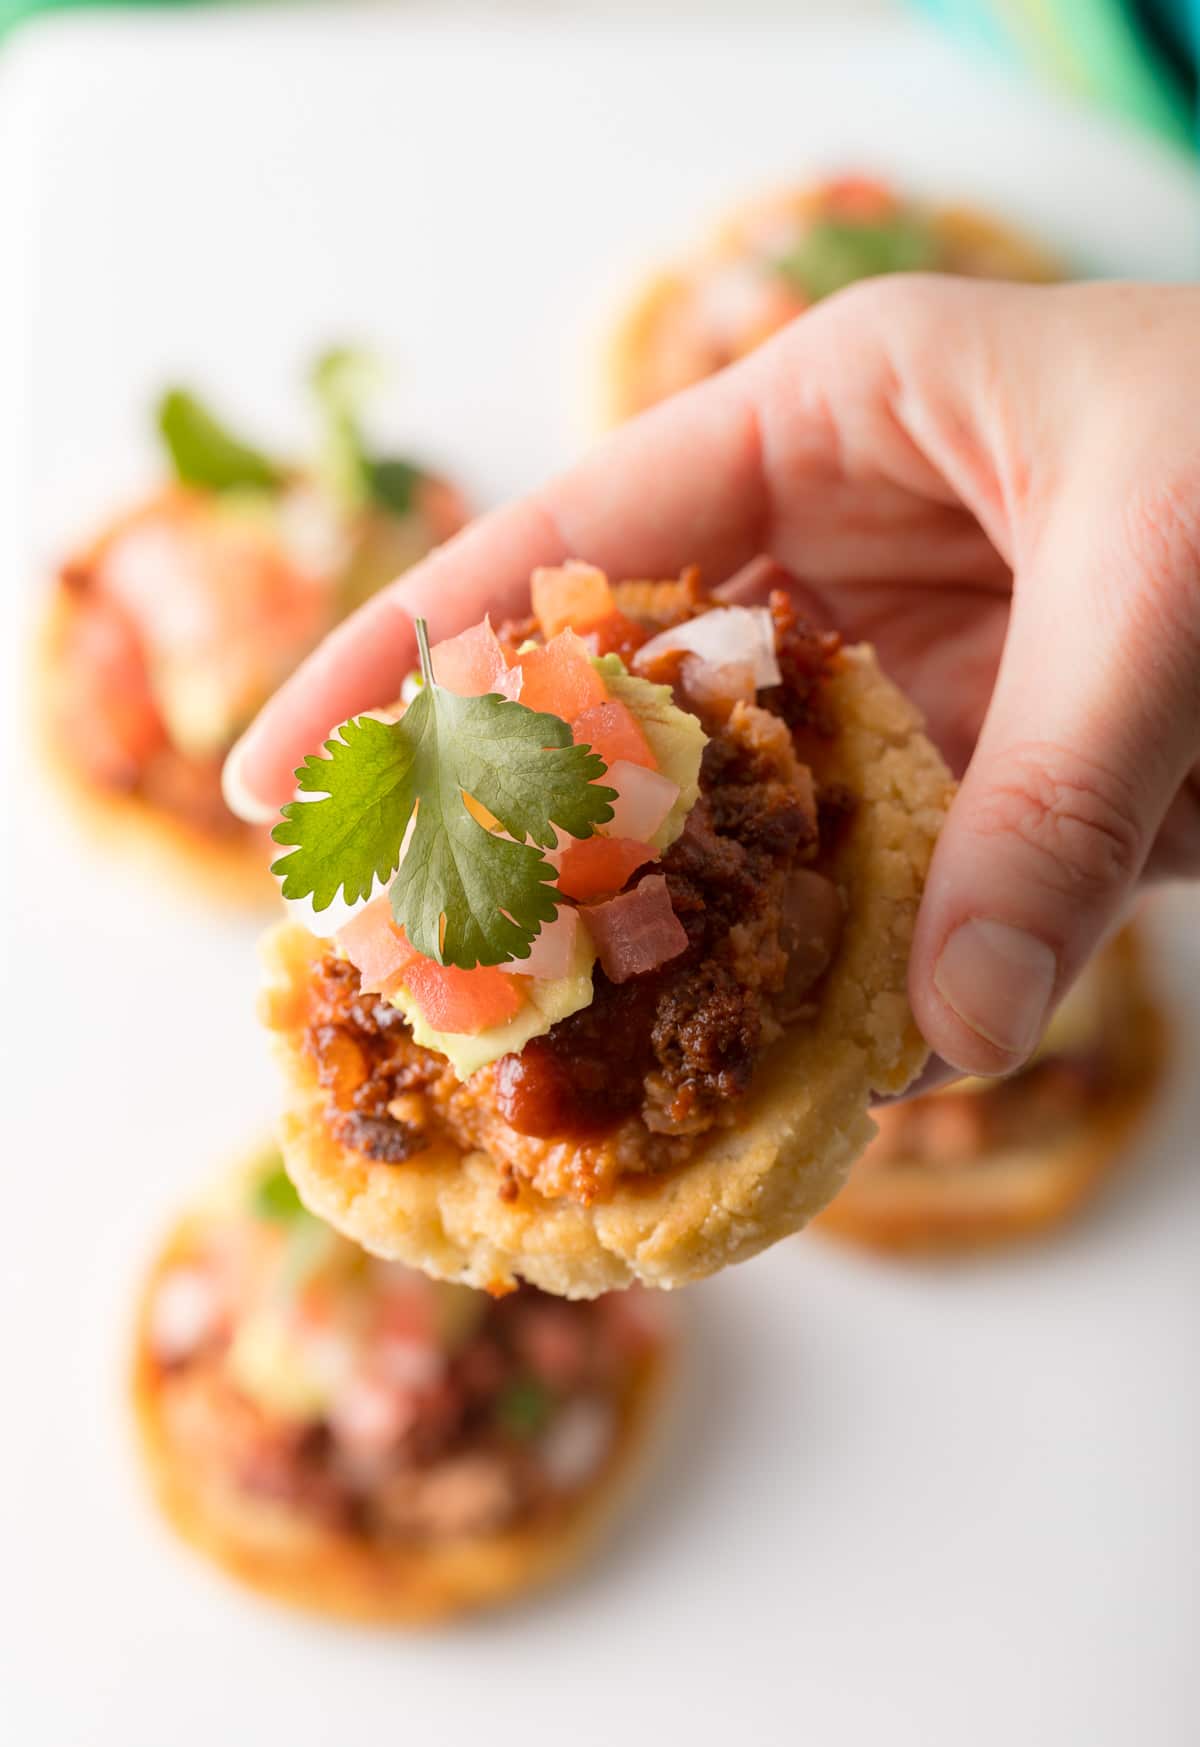
If you’ve never made Mexican Sopes at home, I’m here to show you just how easy they can be! I make these thick little corn cakes so they’re perfectly crispy on the outside while staying soft and tender in the middle. Then comes my favorite part… I load them with meat, beans and veggies for an easy, customizable Mexican meal.

When I think of traditional Mexican cuisine, I automatically visualize favorites that actually fall under the Tex Mex category… Burritos, chimichangas, bubbly taco salad shells, and other foods that involve flour tortillas. There’s nothing wrong with Tex Mex, but traditional Mexican food relies heavily on corn. Introducing flour products in any Mexican dish is the telltale sign of good ole American melting-pot fusion food. However, today I’m going traditional, with my authentic corn Sopes recipe.
Sopes are thick corn cakes, initially found in central Mexico. They’ve became popular all over the country and are now available in various sizes and with various names. Sopes are made with masa (corn flour), usually about 1/3 to 1/2 inch thick, crispy on the outside, and soft on the inside. They taste similar to the corn coating on tamales… Or my tamale pie recipe. However, the fry oil and salt give them a little more flavor and a dazzling crispy texture.
Krystal – ⭐⭐⭐⭐⭐ I haven’t made these before so I was little nervous, but they turned out amazing! Going to add them to our weekly rotation.
Table of Contents

Sommer’s Recipe Highlights
Easy Yet Exciting – Sopes are so simple to make, I can’t believe I don’t do it more often! With just a few easy steps, I can make tantalizing carb-acious corn cakes in minutes.
Picky Eaters Unite! – If you have picky eaters in your family, no problem! Everyone can pile their masa cakes with only the toppings they like best. I’ll share lots of options below.
Make-Ahead & Stack Later – Homemade corn cakes last for up to a week, and freeze very well, so they are great for meal prep and freezer meals. Just quickly reheat them and sprinkle on the toppings.
Key Ingredients and Tips
Sopes can be made with just masa and water. Yet, with a few extra ingredients the wow factor goes way up.
- Masa harina – I use masa harina, or corn flour, as the base for authentic sopes. It gives them that distinctive corn flavor and creates a sturdy dough that’s crisp on the outside while staying tender in the middle. Be sure to use masa harina, not regular cornmeal or corn flour, because they aren’t interchangeable here.
- Salt – A little salt brings out the natural corn flavor of the masa. Since the toppings are usually well seasoned, you don’t need much in the dough.
- Baking powder – I add just a bit of baking powder to give the sopes a lighter, slightly puffed texture. It keeps the centers from becoming overly dense or heavy.
- Water – Water hydrates the masa and brings the dough together. If the dough feels dry or cracks around the edges when pressed, I add a splash more water until it’s soft, smooth, and easy to shape.
- Lard – I prefer lard for the richest, most traditional flavor and a wonderfully tender texture. However, vegetable shortening works well if you’d rather not use lard.
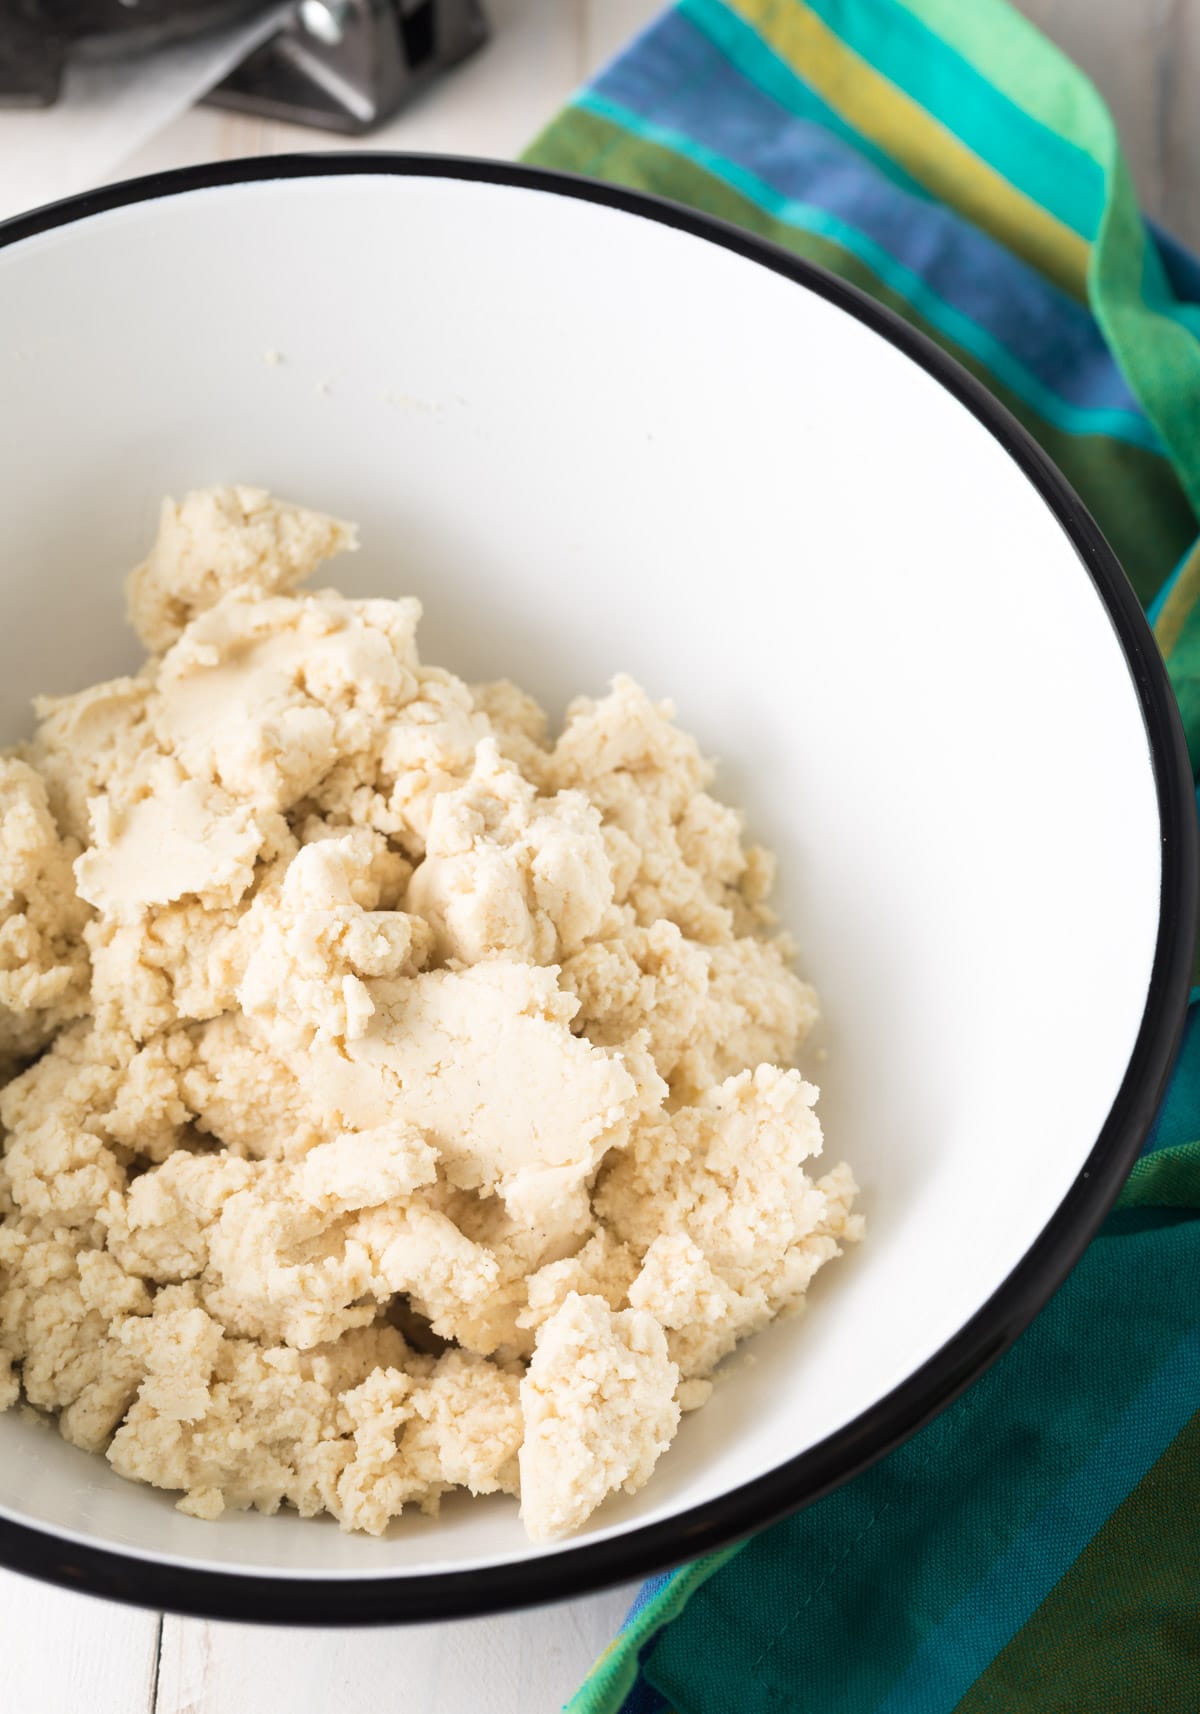
Make the dough – First, I preheat the oven to 200°F so I have a warm place to hold the cooked sopes. (A warming drawers works here as well.) In a large mixing bowl, I combine the masa, salt, and baking powder. Then I stir in the water and melted lard. Once the dough firms up, I get in there with my hands and knead it until it’s very smooth. The dough should feel soft and pliable, without being sticky or crumbly.
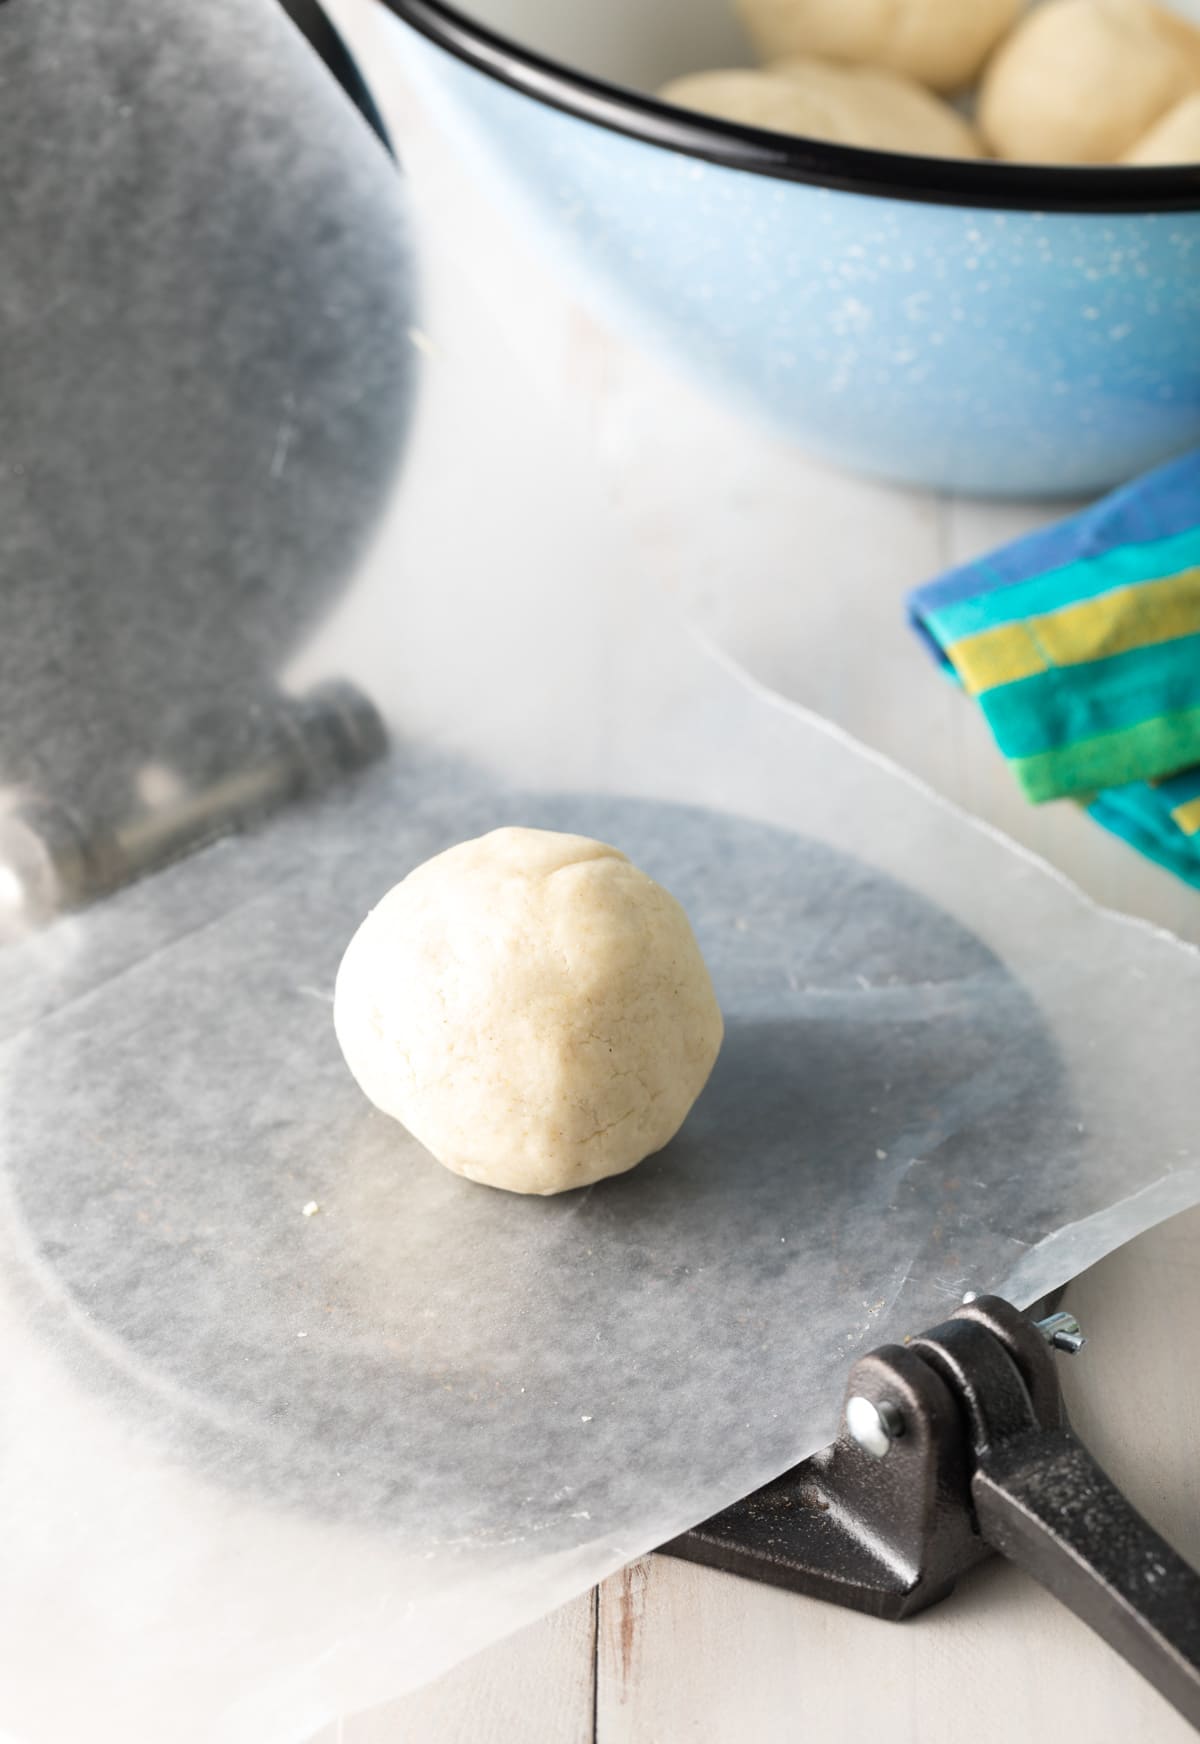
Portion the dough – I divide the dough into 16 equal portions and roll each one into a smooth ball. Keeping them roughly the same size helps all of the sopes cook evenly.
Heat the skillet – Next, I set a large cast-iron skillet over medium-high heat and add enough oil or additional lard to create a layer about ¼ inch deep. I let the oil get nice and hot before frying so the cakes immediately start to crisp instead of soaking up excess oil.
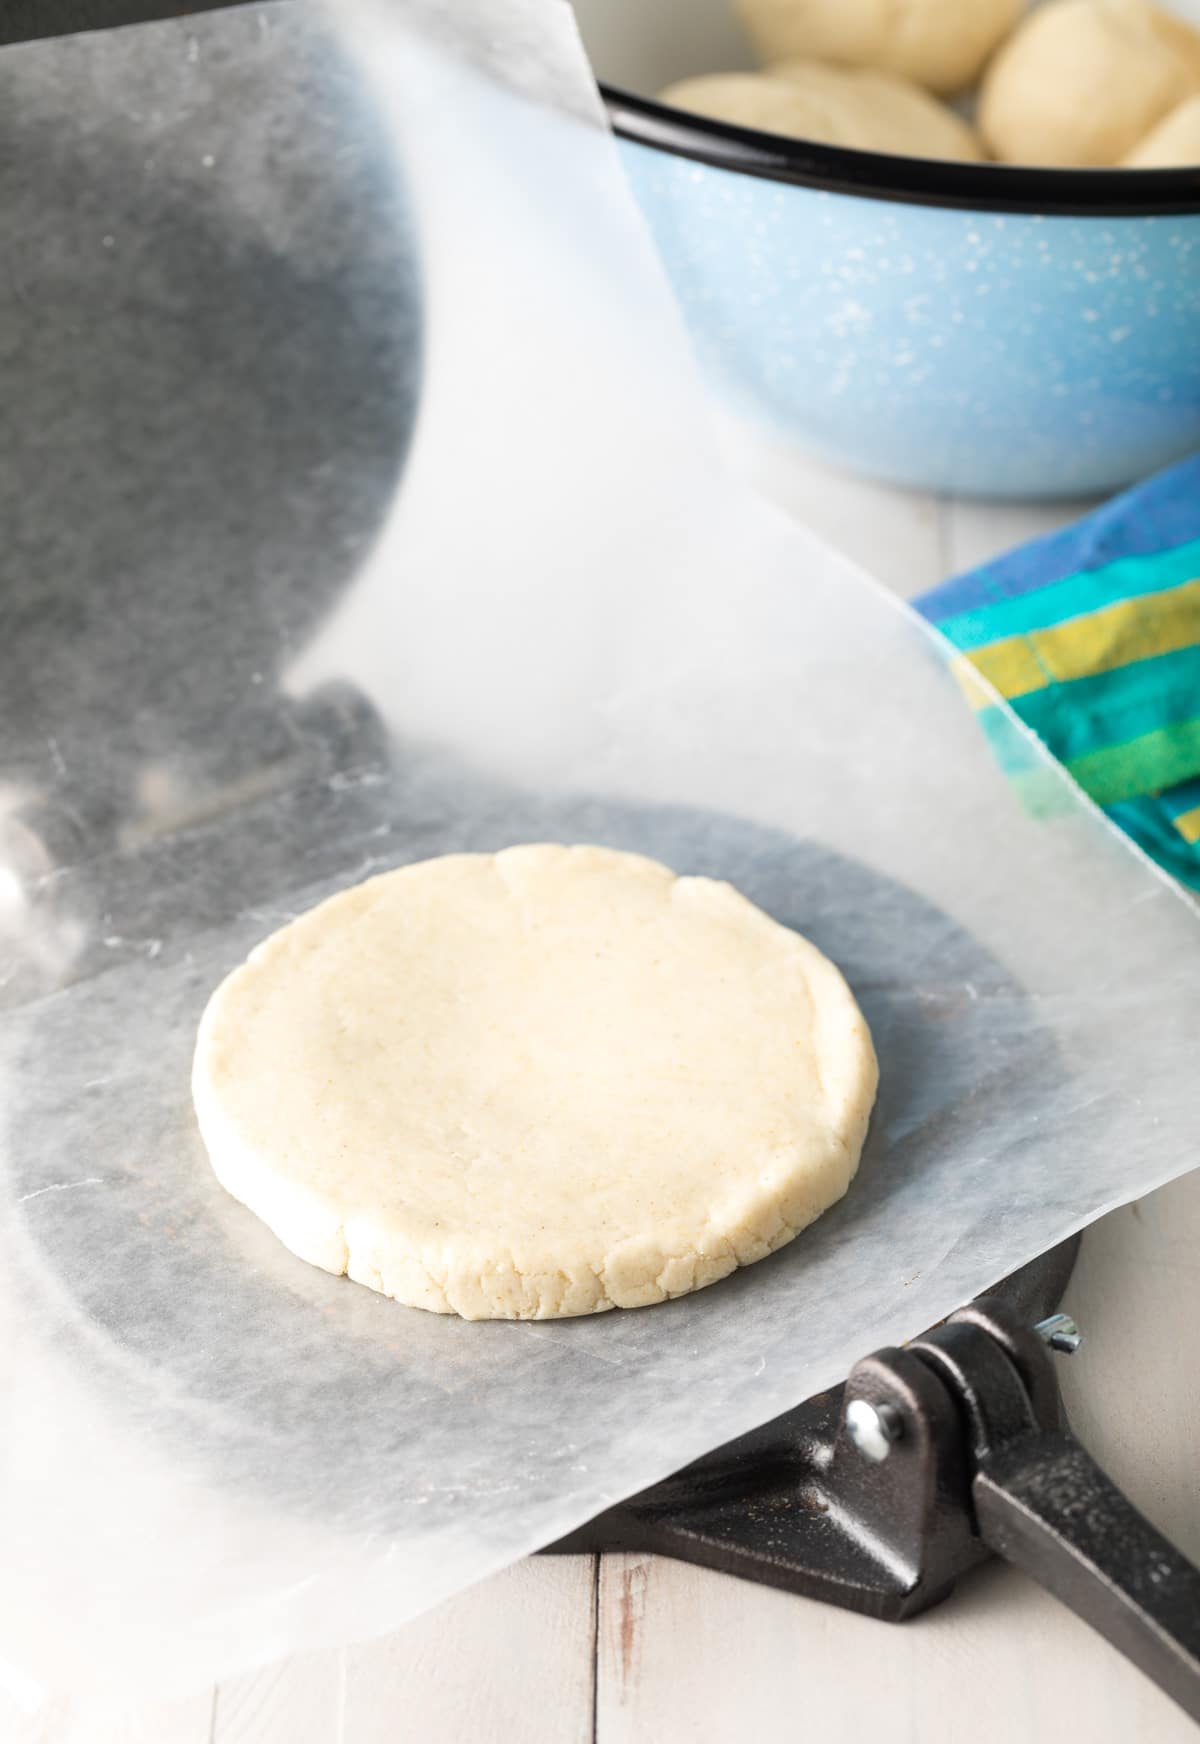
Shape the sopes – While the oil heats, I use a tortilla press to flatten each dough ball into a thick disk, about ⅓–½ inch thick. A rolling pin works just as well if you don’t have a tortilla press. These should be noticeably thicker than tortillas so they’re sturdy enough to hold plenty of toppings.
Fry until golden – Once the oil is hot, I carefully add 5-7 sopes to the skillet, making sure not to overcrowd the pan. I cook them for 2-3 minutes on the first side, until golden and crisp, then flip and cook for another 2-3 minutes.
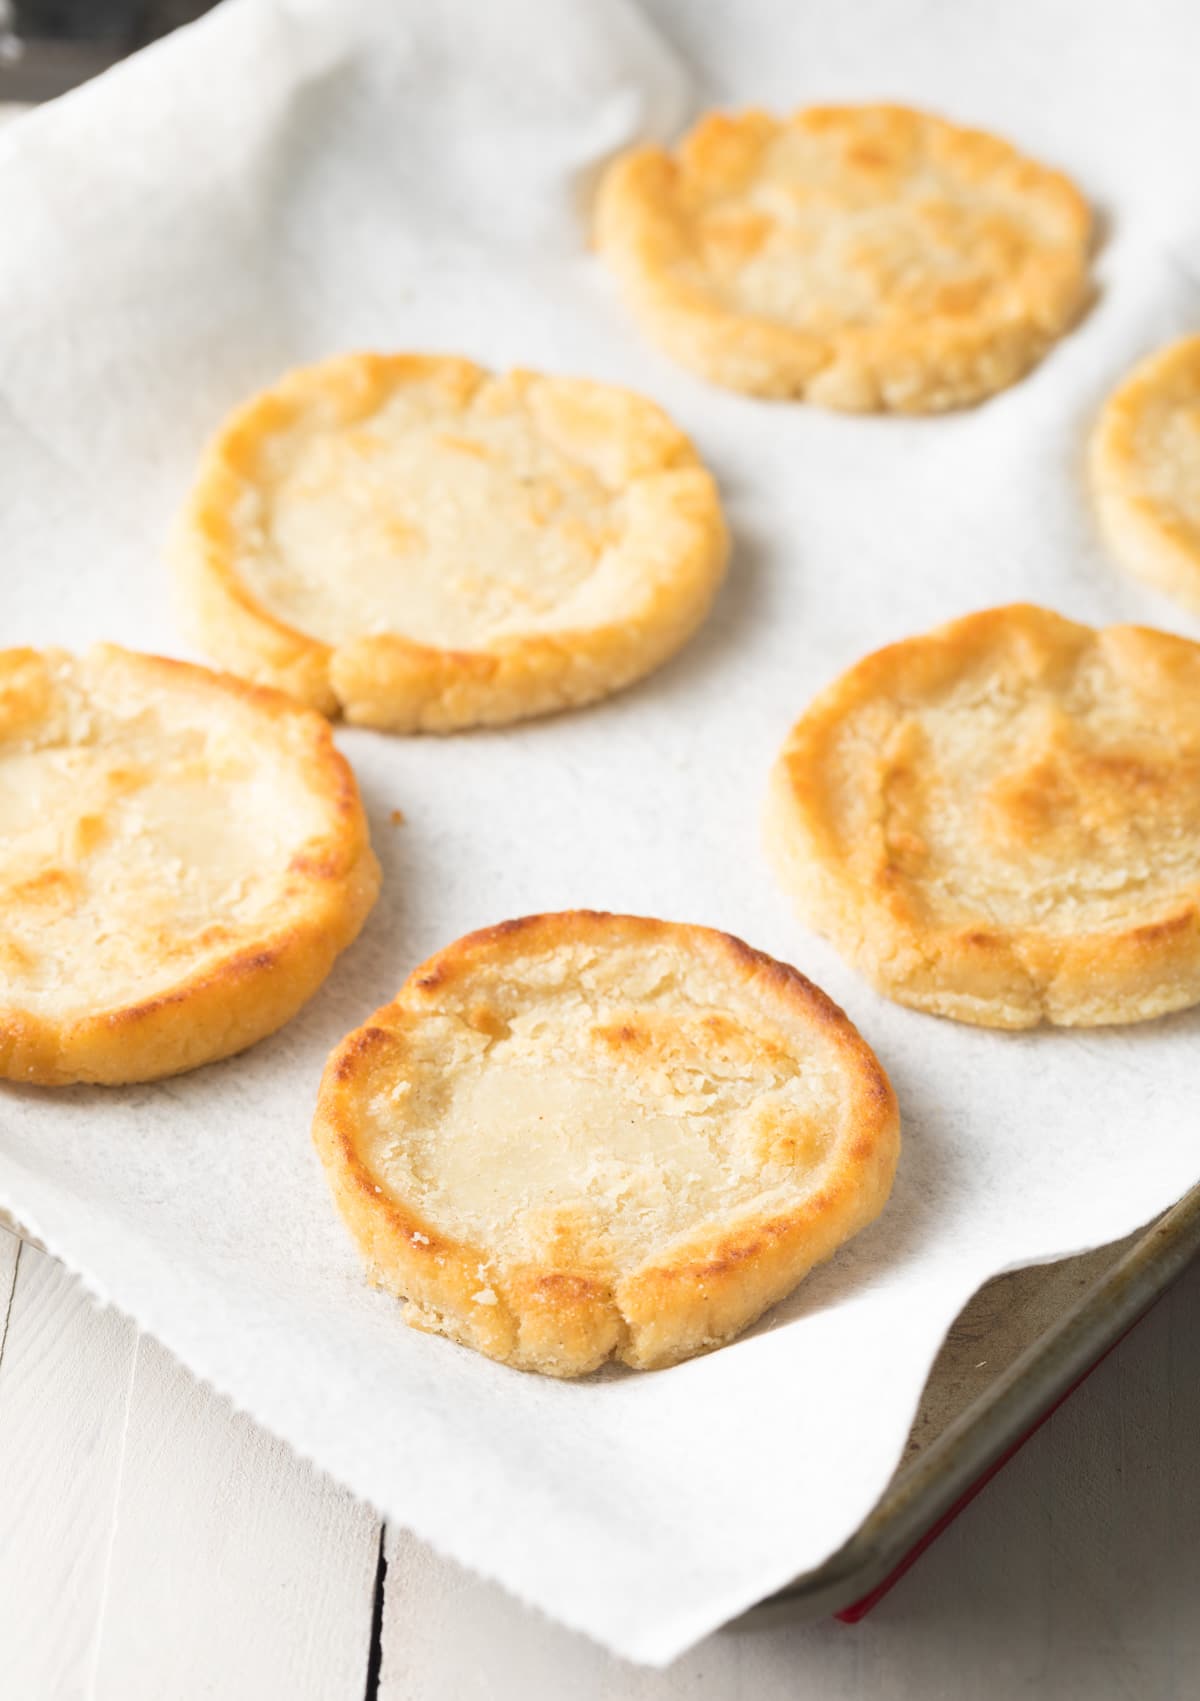
Create the classic rim – I transfer the cooked sopes to a paper towel-lined baking sheet. Then, while they’re still hot and pliable, I immediately use the edge of a tablespoon to press a circular indentation into the top of each sope, creating that signature raised rim. Timing matters here… Once the sopes cool, they’re much harder to shape without cracking.
Keep them warm – I place the finished sopes in the warm oven while I cook the remaining batches, adding more oil to the skillet as needed. Again, I make sure to form the rim immediately after each batch comes out of the skillet.
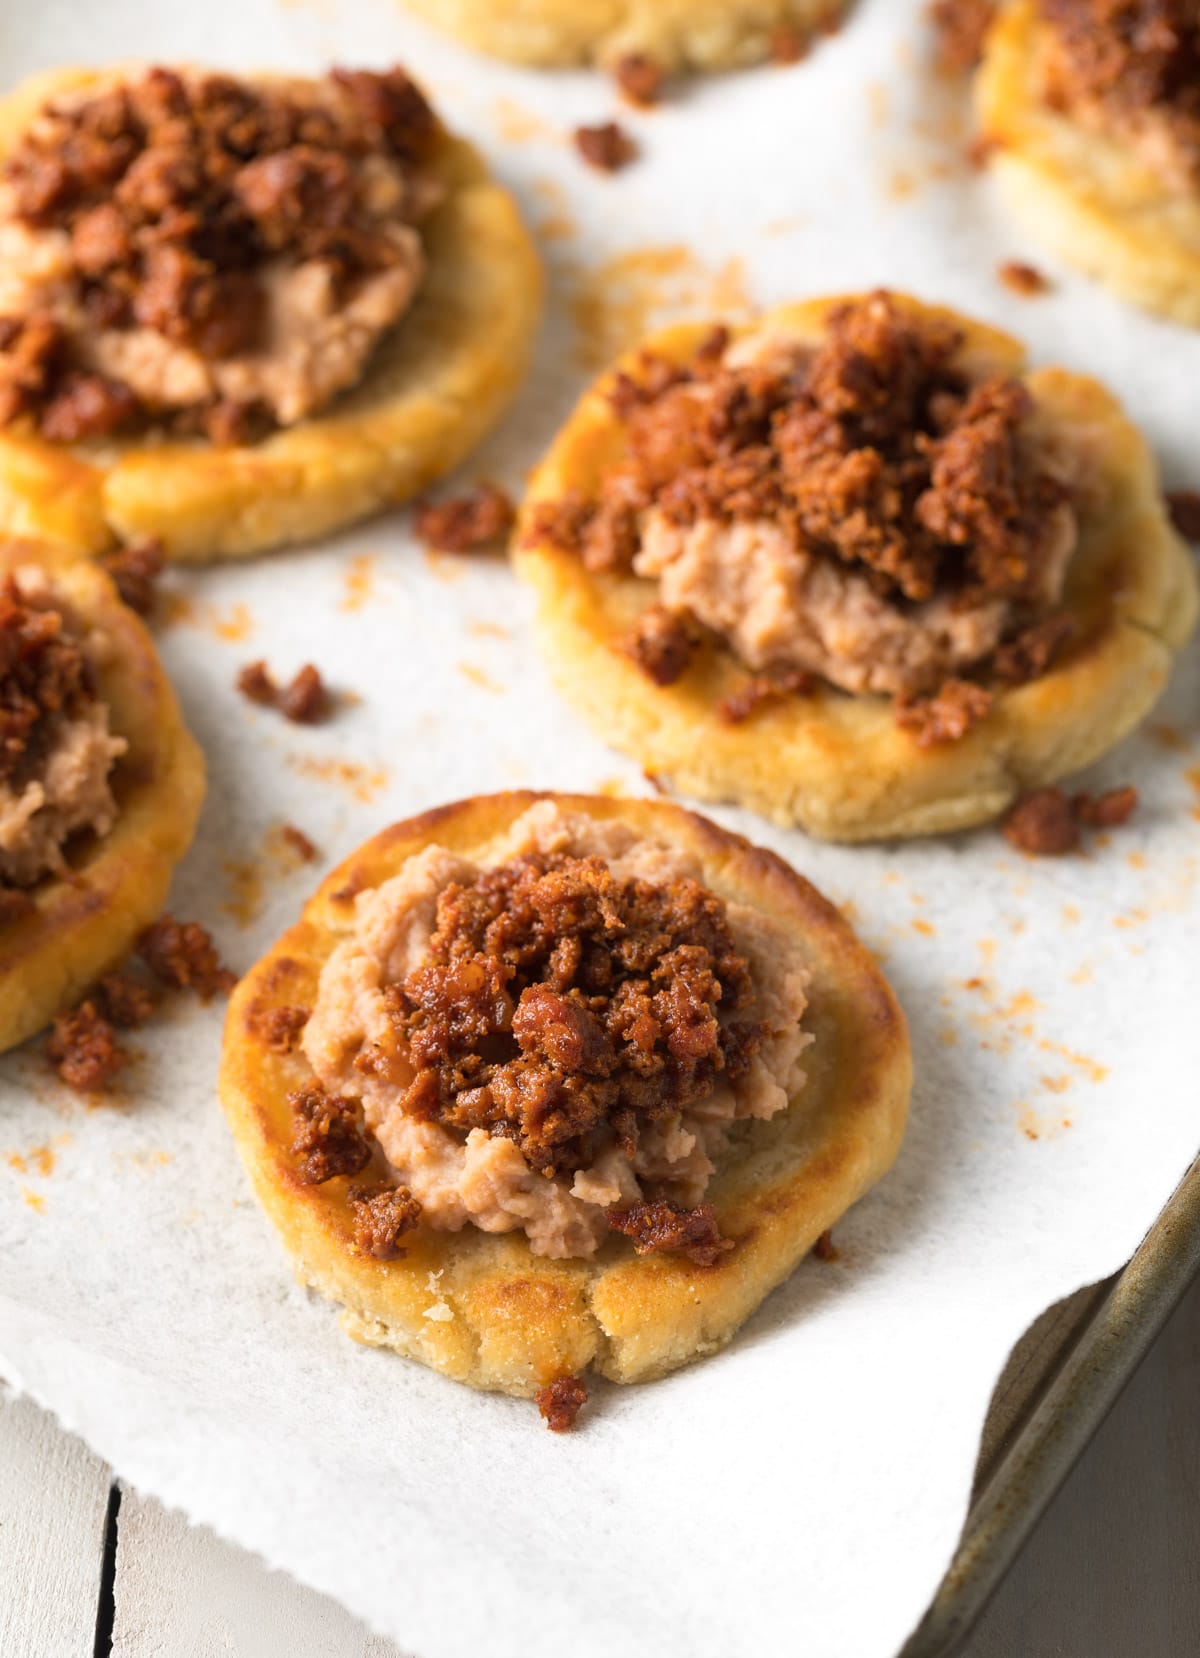
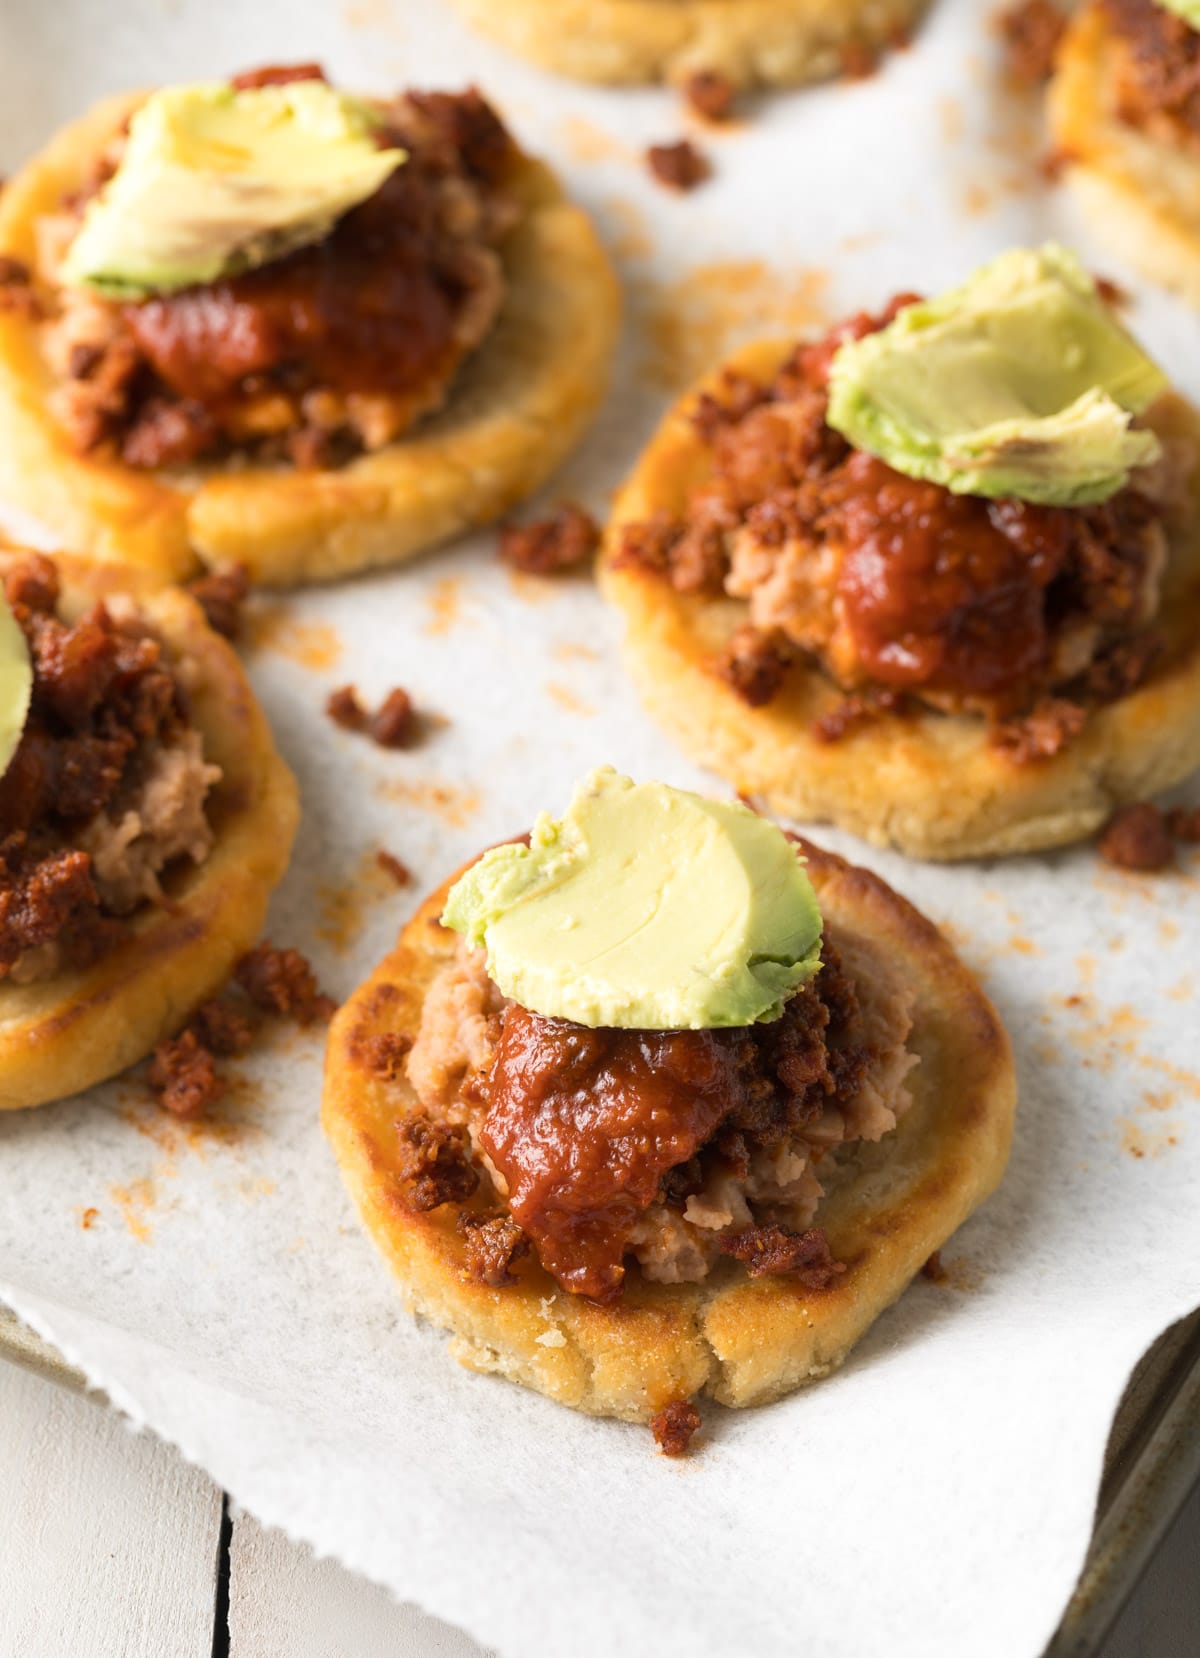
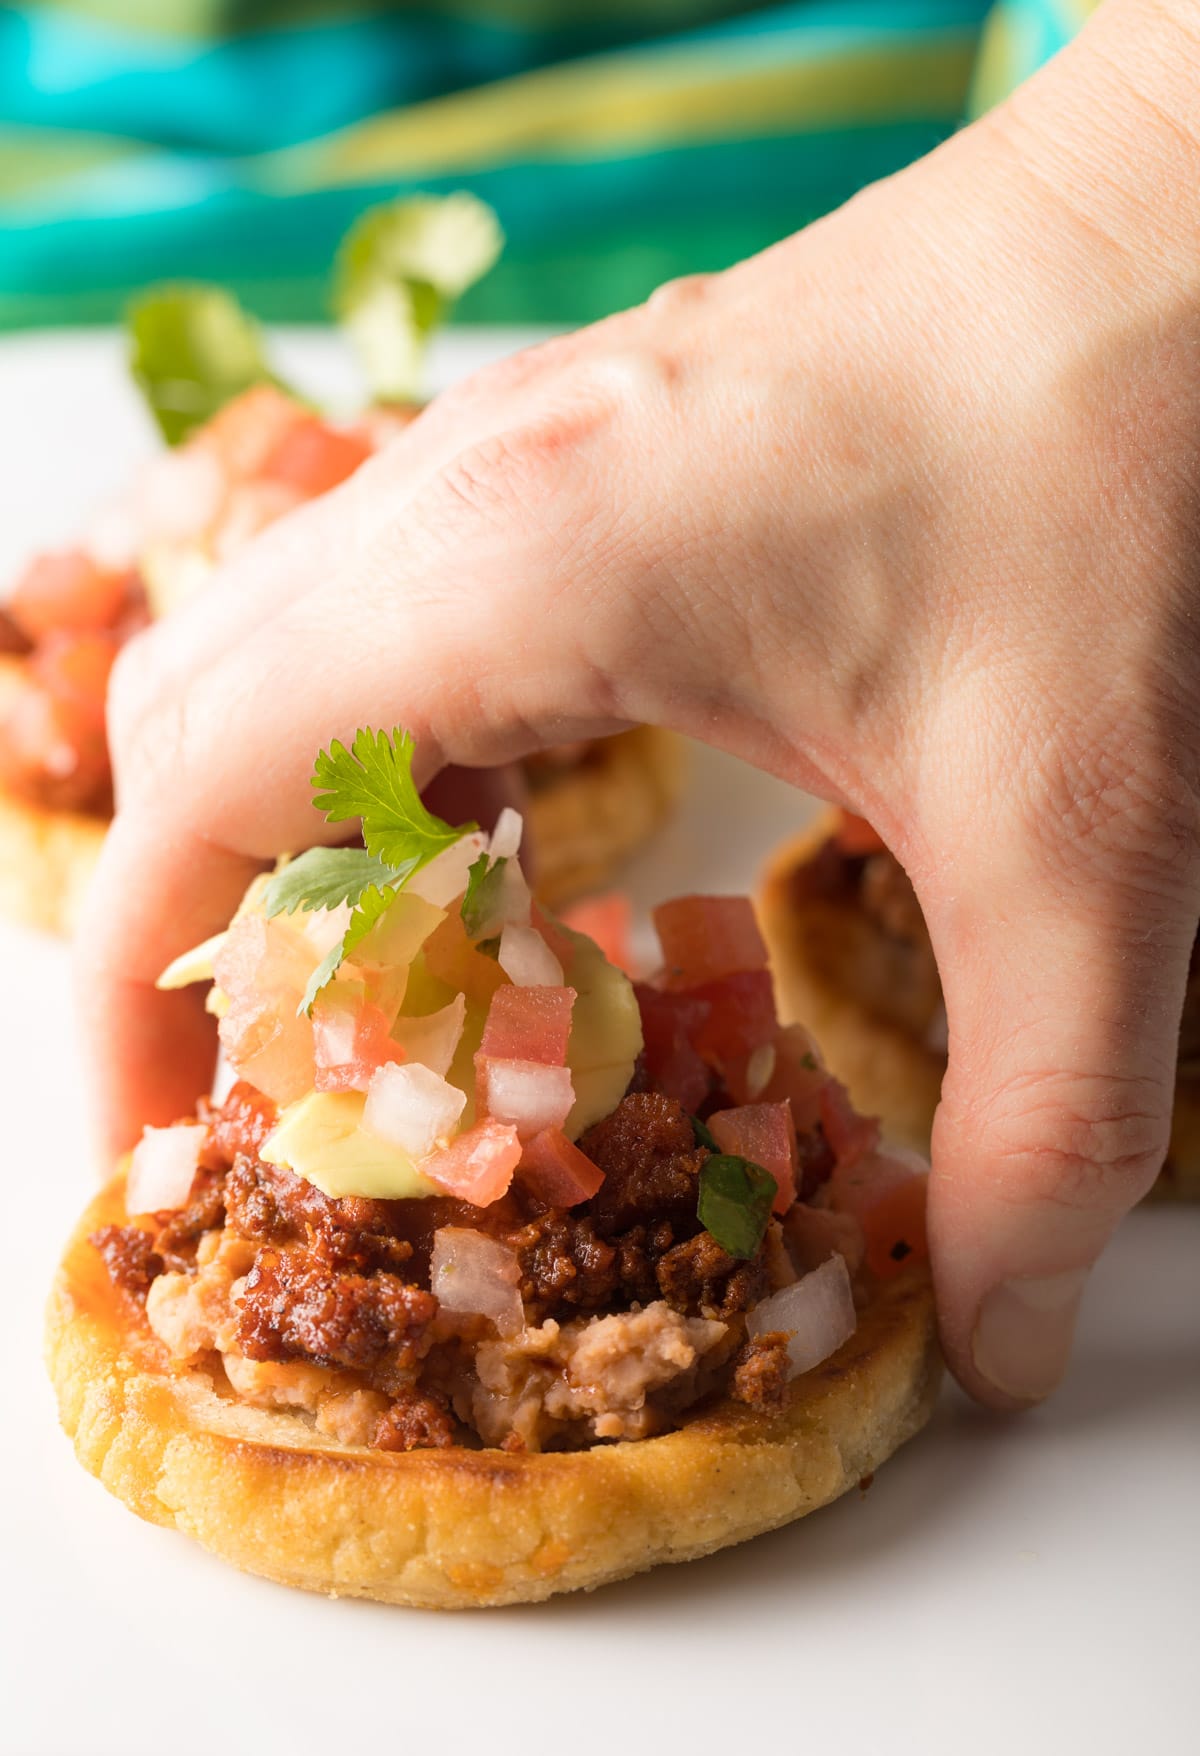
Load them up – Once all the sopes are crispy, golden, and shaped, it’s time for my favorite part, the toppings! I add a dollop of warm refried beans, a spoonful of cooked chorizo, a drizzle of thick chile sauce, pico de gallo, and a slice of creamy avocado. I serve the sopes warm or at room temperature with plenty of extra toppings on the side.
Toppings
Sopes are meant to be a platform for toppings. Again, you can go really simple, adding just refried beans and salsa. Or you can take your sope recipe to the next level with all sorts of fun add-ons!
Today we’re using my favorite combination:
- Refried Beans – To create a hearty creamy base. I personally like to make them from scratch.
- Chorizo – This pork sausage has a pop of salty-fatty goodness. Just sizzle it in a skillet for several minutes before adding to the masa cakes.
- Red Chili Sauce – A thick pureed salsa with a kick. Or use my red enchilada sauce.
- Pico de Gallo – For fresh cool contrast. You can use store-bought or make my easy version.
- Avocado – To add a little bit of luxury on top.
Also, try with:
- Cheese – Queso Fresco or shredded Monterey Jack
- Mexican Crema – or sour cream
- Diced Onion – or chopped green onions
- Salsa Verde – This is my personal favorite salsa on the site!
- Ground Beef – If you’re not crazy about pork, make quick beef taco meat to add some protein.

Serving Suggestions
Make this corncake recipe the star of the show and serve them alongside other Mexican favorites…


Storage
How Do I Store Leftovers? Cool down the shells and store them in an airtight container in the fridge for up to a week. I would store the shells and the filling in different containers, then stack them right before serving.
Can I Freeze Sopes? Yes! I would be sure to double-wrap them well to protect against freezer burn. Freeze for up to 3 months. Then thaw them at room temperature, before reheating in the oven.
Frequently Asked Questions
Sopes are thicker than most Mexican “platform” foods. This makes them much easier to shape when making from scratch, because they don’t need to be as thin as tortillas. It also makes them great for stacking and snacking!
No. The rim just makes them look traditional and helps to keep the toppings in place. You can skip this step if desired.
Yes and no. Yes, you can bake anything that would normally be fried. However, the Sopes will not have the same alluring crispy exterior. If you must bake them, set the oven to 450 degrees F, add a good layer of oil to a rimmed baking sheet, and preheat it, so the oil is hot before adding the Sopes. Bake for 10-15 minutes, flipping once in the middle.
Absolutely. You can make the dough ahead and save it to roll and fry later. Or you can fry up all your Sopes and then reheat them in the oven to bring back the crispy texture.
Of course! Use vegetable shortening instead of lard. Then just select all vegetarian/vegan toppings.
Yes. As long as your toppings are all gluten-free, the Sopes are gluten-free. Be sure to check the package labels if you are sensitive to gluten.
Help Me Spread the Word about this Fabulous Free Recipe! Sharing this recipe link on Pinterest and Facebook is super impactful, and I greatly appreciate it! Find the share buttons below the recipe form.
More Mexican Recipe Favorites




Sopes Recipe
Video
Ingredients
For the Sopes:
- 2 cups masa harina
- 1 1/4 teaspoon salt
- 1 teaspoon baking powder
- 1 1/2 cups water
- 1/3 cup lard or vegetable shortening, melted
- Oil for frying (or lard/shortening)
For the Toppings:
- 15 ounce canned refried beans
- 16 ounce Mexican chorizo, cooked and crumbled
- 1/2 cup canned chipotle salsa (red chili sauce)
- 1 cup pico de gallo
- 1 avocado
Instructions
- Preheat the oven to 200 degrees F. In a large mixing bowl, mix the masa, salt, and baking powder together. Stir in the water and melted lard. Once firm, mix by hand until the mixture is very smooth.
- Separate the dough into 16 equal portions. Roll each portion into a ball.
- Set a large cast iron skillet over medium-high heat. Add enough oil (or extra lard) to coat the bottom of the pan 1/4 inch deep.
- As the oil is heating, use a tortilla press or rolling pin to flatten the balls into disks, approximately 1/3-1/2 inch thick.
- Once the oil is hot, place 5-7 Sopes in the skillet. Cook for 2-3 minutes, until golden brown. Then flip the Sopes and cook another 2-3 minutes.
- Move the cooked Sopes to a paper towel-lined baking sheet. Immediately use the edge of a tablespoon to press a circular indention around the edges of each Sope, so it has a rim. Place the sheet in the oven to keep warm.
- Add more oil to the skillet if needed. Repeat with the remaining Sopes in 1-2 more batches. Make sure to press the indentions into the Sopes while they are still hot.
- Once all the Sopes are cooked, and all the rims are created. Prepare the toppings.
- Top each Sope with a dollop of refried beans, a tablespoon of cooked chorizo, a drizzle of thick chili sauce, a spoonful of pico de gallo, and a sliver of avocado. Serve warm or at room temperature.


They worked out brilliantly THANK YOU.